4.28.2009

a WHALE of a Tote

Have you ever been super proud of something you've done? Like, you can't believe you created something that darned adorable?

You show it off to everyone who will listen and practically give them no other option than to agree that
yes, it is darling, and yes, you are so creative and ooooh and ahhhh?

Well, of course I've done this! Here's my latest cute-overload accomplishment-

It's a "Whale" of a tote! Now do ya get my title? Pretty clever, huh? (Apparently this self-absorption applies to more than crafting in my case...)

My bosom buddy Shelly just had her second bundle of joy boy recently and I wanted to send him something unique and fun. So, all it took was a canvas tote bag, some fabric, thread, yarn, ribbon and a button eye to make me swoon over my own creation. (Hoo boy, this was one of those gifts that was really hard to give away when you want to keep it for yourself! I'll just have to make one for my own boy wonder. =)

And of course, I certainly won't protest if you happen to leave me a comment or two about how you LOVE this bag as much as I do! :)

4.27.2009

Let's Hear it For the Boy!

Let's hear it for my man!

My darling dearest painted my toenails for me! Wasn't that sweet? Since it's pretty uncomfortable to try to bend over and do it myself at this point. He did a pretty nice job, too, dontcha think? (at first I wanted purple to match the outfit I wore on Easter Sunday, but I had to rethink that decision...a light pink worked great for his first time ever! =)

So, now I have to apologize for making you look at my bloated ugly feet. Hope you haven't eaten yet today...

=)

4.25.2009

Cooties for a Cause

If you're interested in buying cooties for that upcoming special occasion, love a good deal, and would like your dollars to go towards helping struggling families- boy have I got good news for you! I've donated a 100 cootie catcher favor package to the Good Samaritan Ministries fundraising auction. Just click here to go straight to the listing for cooties.


There are also LOTS of other great deals and opportunities to support this awesome ministry.

There's not much time left to get in on the auction action- so head over to the Giving for Good Auction NOW!

4.23.2009

What I've Been Up To (the Nursery- Part Deux)

So, I'm sure you've noticed that I haven't been posting lately... (Hey- don't burst my bubble! I'm pregnant and very hormonal- just ask Greg...)

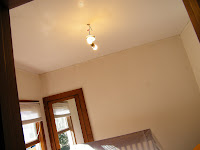
Well, I've been super-duper busy with work, etsy and turning THIS-


into the nursery of my dreams.

It's still a work in progress of course, but here's how it's going:

First, we had the "simple" job of rewiring. Ha! Don't ya just love old houses? Once that was finished (finally!) we had to paint the ceiling and prime (ugh, way stinky!) and then we could get to the fun stuff- COLORS!
The top is a light shade of teal (even though in the pics it looks like seafoam green, trust me, it dried darker)


The bottom is a light shade of green.
(Thanks for your help, Trish and please don't kill me for posting this! =)


The two colors are separated with a chocolate brown stripe (my favorite part, but this took lots of effort with a few hiccups...)


I bought a cheapo light fixture and turned it cute with some brown and white paint. I also bought brown switches/outlets/plates and painted white polka dots on them as well.


Finally, today I added the piece de resistance- polka dots to the chocolate stripe. I think they look just darling!

I've also been working on all of the bedding coordinates for the room. The comforter turned out awesome (if I do say so myself)

and the peekaboo window valance also pleased my critical self! (props to my Grams for teaching me how to sew!)

Still to come- a bedskirt to match the valance, bumper, roman shades, diaper stacker, etc. Oh yeah, and we've got to get all of the door and crown moulding back on (right after we clean up all of the paint left there by the previous owner- that'll be a fun project!)

SOOOOO.... Whaddya think?
(don't forget I'm hormonal and everything! =)

4.13.2009

Do You Use Reusable Grocery Bags?

If you answered "no" to this question, well then, why ever not?

Maybe you haven't even thought about it, or think it's too much of a hassle, or think they are too expensive, or like the convenience of having plastic bags around the house.

Well, chew on this- Americans throw away over 100 BILLION plastic bags each year! That's plastic that won't biodegrade for centuries, filling up our one and only earth- not to mention the harm it causes wildlife.*

Okay, if you know me personally, you will think this post is coming out of left field- after all, I'm not your average tree-hugger, nor a gung-ho environmentalist. But, I do believe that as a child of God, and one gifted with life on this planet, I am responsible to take care of His creation.

Even if you don't agree with that- I will give you some great reasons to invest in your own reusable grocery bags-

1.) They are cheap. I shop at Meijer, and their blue bags are only $.99 each. I also got a bunch from Walgreen's, when they had a 3/$1 sale on them. I know you can get them at every major retailer. I personally own about 10 bags and I store them in my car trunk so I always have them when I go to the store.

2.) They hold SO much more than an average bag and don't tear when there's a sharp corner shoved in there! I shop for two people each week. I usually have 4-6 bags on average full of groceries. Their handles are also long enough to fit over my shoulder- so instead of 4 trips to the car for the bazillion plastic bags, I can usually get them all in 1-2 trips.

3.) This may seem insignificant to some, but I like how they stand up, like a paper bag does (which by the way, take more energy to produce than a plastic bag, so they are no better in the environmental debate of paper or plastic). The groceries don't roll all over in the trunk, my bread doesn't get squished, nor my bananas bruised.

4.) Just as plastic bags are convenient for hauling stuff, so are these bags, and so much more durable, too. Honestly, I was a plastic bag lover before. I even have a caddy under the sink to store them. But, really, I don't miss the overload I had before. (And we are lucky enough that our recycling service takes these plastic bags).

5.) Your grocery store clerk will not mind, trust me, you won't offend them. Just make sure you put your bags at the front of your order on the belt, so they can load them up as they go.

*Source

4.10.2009

Baby's Room Sneak Peek

It's our firstborn, so we (read: Trina) would really like our nursery to be special. Doesn't everyone feel that way? From the get-go, I knew exactly what I wanted for the colors/overall look of the nursery. I wanted to make it all myself- nothing premade that every other little tike might have. I didn't want a theme- no monkeys, sheep or trucks for our little prince. I wanted something funky/modern with these colors- Lime, Chocolate and teal/aqua. I wanted circles, polka dots and stripes. Is that too hard to ask for?

Apparently, it is. As soon as I started searching for the fabric of my dreams I realized it didn't exist. (Except for special-ordering from a designer company at $34 a yard plus shipping- yikes!) Actually, more than once I was brought to tears (I'm sure the hormones raging through my body didn't help) with my seemingly endless search for the right fabric. Finally, FINALLY, I found something I could live with and make work for the right price, while searching on etsy.

Michael Miller "Round-About" in Spa
Michael Miller "Lolli Dot" in Spa
Though the colors seemed to be green, brown and light blue, I still decided I wasn't going to find anything better and with only 3 months to go, I better get crackin'. So, I ordered some swatches, just to be sure. When they came in the mail- they were the perfect colors! The blues don't seem to show up right on the computer (even in these pics) and are actually teal/aqua. I cried. I mean, I actually really cried I was so happy. (again, thank you hormones...)

Now that these were decided, I thought it would be pretty simple to find a stripe in these colors. Ha! Learn from my presumptions, people! No, I can not find a stripe that matches, even in brown/white, to save my life. So, in an effort to save my sanity, I decided to keep it a little simpler and go with a coordinating brown minky dot fabric:
I've finally designed where everything will go and have ordered my fabric. Yay! Something to cross off the list.

So, that brings us to the next giant aspect of the nursery, the crib. Ugh. This is such a hard decision! We had one picked out from Babies R' Us, but then I decided I didn't like it anymore. We found one at Target that seemed perfect, but it was so short! Then, we found one online, and I loved the overall look, but it was sooooo expensive. The next one was great, but the hardware was showing. Finally, I decided to go with the one from Target (even though I detest this place) and when we went to pick it up with Greg's parents, they didn't have it in stock. (nor did could they order it, nor could they tell me when it would be in. Did I mention I loathe Target?)

Why, oh why, would you do that to an indecisive pregnant woman who has finally made up her mind about something? (You know that sent me on another frantic search for the perfect crib.) Anyhow, in the end, we found that another Target in the area had one in stock and made the final decision to purchase it. And, all's well that ends well, because I LOVE it!

I'm in charge of directions!


Today's the day we prep the room for paint! Surprisingly, I didn't have too much trouble deciding what I want to do with the paint. It came to me in a miraculous epiphany one day. (ha!) You'll have to wait to find out, though- I may just change my mind! =)

4.09.2009

My husband's enemy

What is it, you ask?
Bet you'd never guess a mulberry tree.

I'd better start at the beginning:
When we bought this house 6 years ago, we loved how the backyard was framed with 2 trees- a maple and a mulberry. We built a privacy fence, put in a patio, and enjoyed our new sanctuary.
That lasted a year until we decided that all the landscaping must go, to be replaced by new EVERYTHING! (When I say everything- I mean it- not a scrap of grass or rock or anything was saved from destruction and removal). We also installed in-ground sprinkling ourselves. That was a very hot, very dirty summer.

But, the effort paid off. I discovered I've got a really green thumb (outside, that is- don't ask how I kill all the indoor plants...) and Greg discovered he was a lawn man. He really, really, REALLY loves his new lawn. Actually, it caught me pretty unawares that I was now married to "that guy." You know, the one who weeds by hand and yells at neighbor kids to "Get off my lawn!" (Okay, admittedly, he only yells in the house so I can hear- he's never actually gotten their attention.)

So, imagine Grass Guy's reaction when the mulberry tree (and all the birds that love it) kept dropping berries and ummm, droppings on his precious emerald carpet. Every year since then, he has been saying he's going to get rid of that tree. And every year I keep pleading with him not to- it's lovely, gives great shade, frames the backyard in nicely, and brings birds to our backyard utopia. I've won every year so far and he has done his part to rescue his fescue by placing tarps on the ground, getting up in the tree and shaking until the mulberries fall off. He does this several times during the growing season. Once, he actually had his shop vac out there, sucking up all the fallen berries and any crushed ones. We had mulberry wine fermentation scenting up our garage that year. Yuck.

Well, apparantly 2009 was the year for victory over a tree. On the Saturday I got my office moved to the basement, he was determined to cut down (sniff) my tree. He was so anxious to get rid of the poor thing, that this is how he and his friend Jeremy decided to risk their lives in an effort to protect grass-
That's right, Greg is using a reciprocating saw to cut down the tree (he's on the roof of the garage, if you're wondering). And Jeremy is using an extension cord to pull the large branches towards him. When I pulled in the driveway with pizza for lunch, I took one look at their setup and knew I had seen it somewhere before... (Jeremy knew exactly what I was thinking- America's Funniest Home Videos)

After all was said and done, I think our backyard looked empty and sad, but Greg was pretty happy (victorious is probably a more accurate term). And if it prevents him from obsessing just a little bit this summer, I guess that's a pretty good trade-off.

4.08.2009

Wedding Place Card Holder / Favor Tutorial

Need a cute, fun, inexpensive idea for wedding favors/place card holders?

These fun embellished clothespin magnets are the perfect idea; they're super simple to put together and look great!
(watch for them on theknot.com's upcoming do-it-yourself blog! Link to follow)

Also, if you're not keen on doing-it yourself or don't have the time, I'd be happy to put together a custom order for you. Check out my etsy shop- katskrafts.etsy.com

Materials Needed:

Clothespins

Magnets

Mod Podge

Diamond Glaze (or hot glue)

Decorative paper

Ink Pad

Ribbon (optional)

Scissors/paper trimmer

Small foam brush

Step 1

Trim decorative paper to just smaller than clothespin side. You will need 2 strips of paper for each clothespin. Spread a thin layer of Mod Podge along each side of the clothespin (using the foam brush) and adhere the paper to it, pressing out any air bubbles.

Step 2

Using an ink pad and a light touch, distress the outer edges of the clothespin. Allow to dry.

Step 3

Spread another thin layer of Mod Podge over the clothespin sides, to seal, making sure to cover all of the paper edges. Allow to dry. Apply a second coat, if desired.

Step 4

Adhere the magnet to the back side of the clothespin using Diamond Glaze (recommended) or hot glue. Press firmly until the magnet is secure, or the magnet will be attracted to the metal of the spring and may rip your paper. The best position for ease of use as a magnet is just above the spring. Neodymium magnets offer the strongest pull and can be ordered online from many reputable sellers.

Step 5

Tie ribbon onto the clothespin, or embellish any way you see fit! (Other neat ideas include rhinestones, a monogram, or silk flower with button center.) These work wonderfully as place card holders and are a fabulously fun and functional wedding favor!